How To Properly Seal a Water Pump Gasket? [5 Easy Steps]
Water pumps are hard to deal with, especially considering how much maintenance you have to do and how careful you have to be to prevent leaks. But even then, some mishaps may lead to leaks even with the gasket attached.
This makes many people wonder how to properly seal a water pump gasket and surprisingly enough, it’s not too difficult. In a nutshell, you just need to get your gasket lined up with the directional arrows and tighten it evenly. Just make sure your sealant doesn’t enter the housing.
However, there’s much more to it than this. Hence, we’ll be covering all about water pump gaskets, how to seal them properly, and some tips and tricks to help you along the way.
So without further ado, let’s begin.
Contents
What Exactly Is A Water Pump Gasket?
Before working with water pump gaskets, it’s important to know what they exactly are and their purpose. In short, water pump gaskets work like a seal between your water pump and your engine. This helps prevent any leaks and is extremely important for the cooling process.
So if you don’t seal the gasket properly, it can create many issues and may stop functioning. In this case, you must replace your gasket to prevent further damage to the pump’s engine.
This is why it’s critical to properly seal your gasket, because if you don’t, it can damage your engine and the gasket, and you’ll need around $400 – $500 to replace it.
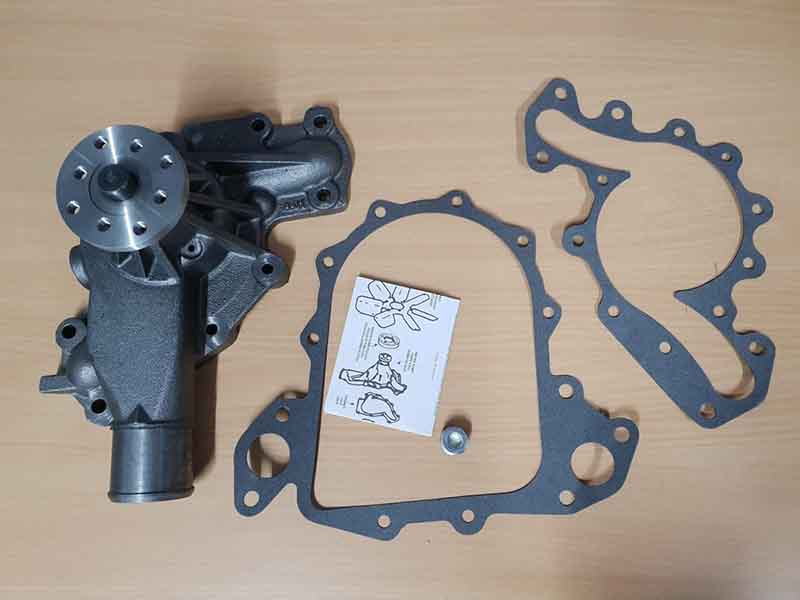
Materials Required To Seal a Water Pump Gasket
Here is a list of the materials you need to seal a water pump gasket —
- An 8 mm Wrench
- A Gasket Sealer
- A Water Pump Gasket
- Gloves (Optional)
How To Properly Seal a Water Pump Gasket?
Now that you have a good idea about water pump gaskets, their use, and their importance, here’s a step-by-step guide on properly sealing them —
1. Check If The Gasket Fits On Your Pump
Firstly, you’ll want to check if the gasket fits or not. Align the gasket to the directional arrows on your pump and make sure the bolt holes are aligned as well.
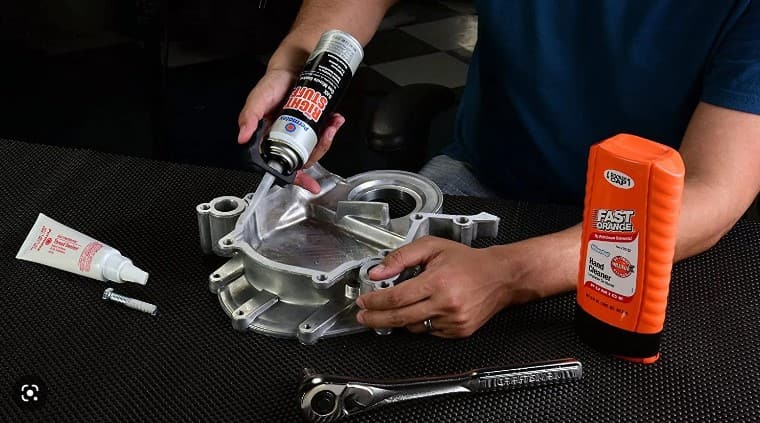
2. Apply a Gasket Sealer On The Pump
Now that you know the gasket fits perfectly, apply a gasket sealer around the pump. Don’t worry if it isn’t an even circle since you’ll need to use your finger to apply a light coating around the outer surface of the pump.
Any gasket sealer works, but the most popular one you can find is an RTV Silicone Gasket Sealer. This entirely depends on personal preference, so you can use whatever sealant you think works best.
3. Place The Gasket On The Pump
Follow the directional arrows, align the bolt holes with the gasket, and place it on the water pump.
4. Apply Sealant Around The Housing
After placing the gasket, put some sealant around the housing with your finger. A light coating works fine. Make sure the sealant doesn’t enter the housing itself. It should only be around the housing.
5. Place The Water Pump And Tighten The Bolts
Finally, place the water pump carefully while aligning all the bolts, and tighten it up with your 8mm wrench.
Tips & Tricks When Dealing With Water Pump Gaskets
So you already know how to seal a water pump gasket properly, here are a few tips and tricks to help you along the way —
1. Flush The Cooling System
Many people don’t flush the cooling system or simply forget, but this can cost you a lot. An old coolant will often be contaminated with impurities and damage the dynamic seal surface, leading to premature pump failure.
But you can simply prevent this by flushing the cooling system, as it’ll clear out any debris. Usually, a hose should be used for this, but if you want, you can use a flushing tool from a local water pump store.
2. Never Use Old Coolants
Reusing the coolant from your old water pump might seem sensible, but it isn’t a great idea. Coolants tend to deteriorate over time, so it’s best to use a new coolant for your pump.
3. Vent The Cooling System
After replacing a water pump, you should always vent the cooling system to let out any trapped air. This will prevent many issues you might have with the cooling system.
Video of Properly Sealing A Water Pump Gasket
If you want a visual representation of how it’s done, here’s a video that can help you through the process.
FAQs
What is the best sealant for a water pump gasket?
A sealant that isn’t corrosive, safe for the sensor, and RTV-based silicone formulated, is best for your gasket.
Do I need to put silicone on the water pump gasket?
If you apply sealer on the pump’s joining surface or on the housing, you don’t need to put sealer/silicon on the water pump gasket.
Do metal water pump gaskets need sealant?
Yes, you may need to use sealant on the gasket of a metal water pump. But if your engine uses an O-ring or dry seal, you don’t need to use a sealer.
Do paper gaskets need sealant?
Yes! All sorts of gaskets should have a sealant, so you should apply a sealant even on paper gaskets. Any silicone-based sealant works, so you can simply get one from a local automotive water pump store.
How long does gasket sealant need to dry?
It’s best to leave your silicone gasket sealant out to dry for at least 24 hours, but 48 hours is the recommended time. This will ensure it’s properly dry and the fluids won’t break it up.
Is a glove necessary for sealing a water pump gasket?
No, a glove isn’t always necessary. It’s completely up to personal preference, and most sealants for water pump gaskets aren’t toxic to your skin. So if you want to, you can wear a glove, but it isn’t necessary.
Final Word
Hopefully, now you have a good idea of how to properly seal a water pump gasket. It’s not that difficult, and you won’t need any extra tools other than a silicone sealer, wrench, and gasket itself.
As a final tip, we’d highly recommend changing the coolant every five years or so. They tend to get tons of issues over time, so you should always replace them to prevent damaging your water pump.
You can also wear gloves if you’d like. Silicone sealants aren’t always good for your skin, and simply using a glove can prevent health hazards. It’s better to use gloves, too, as pumps are often dirty.
But with all that being said, good luck sealing your water pump gasket, and cheers!
As an Amazon Associate, I earn from qualifying purchases.
![How To Cover A Pool Pump [7 Pool Pump Cover Ideas]](https://pumpingpies.com/wp-content/uploads/2022/08/How-To-Cover-A-Pool-Pump-7-Pool-Pump-Cover-Ideas-768x432.png)